Wednesday, November 19, 2014

Computer Monitor Cover Up


Happy Wednesday to everyone!

It's been crazy around our house. We have had weddings, baby showers, and lots of things in between. This weekend is my daughters birthday party and I am still trying to keep up with all of the book work for my husband's business. 

As I was working at my computer last night, my eye kept wandering to that pesky spot on the bottom of my computer monitor. The spot where I tried to remove crazy glue dribble with some goo gone. The goo gone did not remove the glue but did remove the finish.  :(


Since my office has coastal decor, I decided to try to cover the spot with a scrap book page of a map. So I took out my modge podge and a paint brush. In less that 10 minutes, it was finished!

First I cut my paper to size leaving a little extra on the sides so that I could tuck it under the monitor.  Then I put the modge podge on the monitor stand and applied the paper. 
Next, I smoothed it out and turned the monitor over to tuck everything in on the bottom. I went over the top with a coat of modge podge as well.


I left it like this over night to dry. 


Much Better! Now I can do paperwork in peace.

 I have tried to get fired from my husband's business for years now and he keeps telling me the same thing. "You can't fire someone that works for free!" I should ask for a raise :)


Wednesday, October 29, 2014

Pumpkins


Happy Wednesday everyone. 

I have been looking around blog land for fall decorating inspiration that doesn't involve the color orange.  I do have some orange, but it is not my favorite color.  I came across a pumpkin that was made from a roll of toilet paper and scrap material. Since I had all of the supplies that I needed on hand, I gave it a try. 

I used :

1 roll of toilet paper.
scrap material
hot glue gun
scissors
a cork from a wine bottle.


First, I cut the toilet paper in half & removed the paper center.  Then I got some scrap material and cut it in to long strips. I used the liner of an old basket that I had. The color is off white. 

Next, I started wrapping the scraps around one of the pumpkin sections. I used hot glue on the end of each piece of scrap to hold it in place. I did that until the toilet paper was covered on both pieces.


I used the hot glue again to secure the wine cork in the center of each pumpkin.  This was a quick, easy, and fun project.


The only thing that I would change is the height of the wine corks. (pumpkin stems). There are so many different kinds of wine corks. These were the only ones that I could find that were big enough around. I am going to keep looking for taller stems but since I do not drink, It makes it a bit harder to find.  I might decide to use a piece of drift wood if I can find two pieces that look right.  Over all, I think they are a cute addition to my fall decor.


Enjoy Your Day!
Thanks for checking out today's post.

Friday, October 17, 2014

A Dolphin Birthday Continued

Happy Friday everyone!  I just love Fridays. There is just something great about knowing that I don't have to wake up before the rooster does on Saturday that makes me in a good mood on Fridays.   

I am still working on games for my darling daughter's 9th birthday party. I found a cute bean bag toss on the net that had fish on it.  It didn't take me long to come up with a DIY dolphin version.  


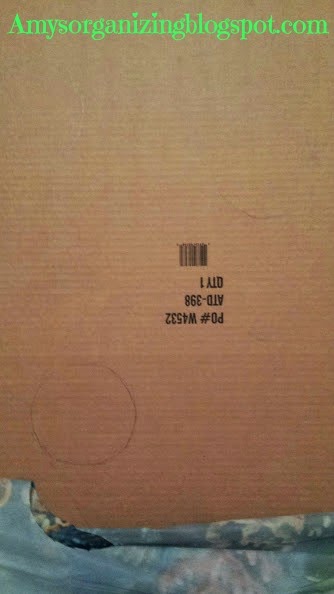
First I got a big card board box from work and cut out the part that I needed.


 Next, I covered it with a dolphin table cloth from the Dollar Tree.  I traced circles on the table cloth with a jar.  I took off the table cloth to cut out the holes and then put it back on the box.


I traced through the holes in the table cloth to the box so that I would know where to cut the box. I took off the table cloth again and cut the holes in the box. Sorry, some of the circles are hard to see in the picture. 


 I put the table cloth back on the box and lined up the holes. I used tape to hold the table cloth to the box. This is a view from the back.


Instead of bean bags, I used soft cloth balls that I also got from the Dollar Tree.  Here is the finished product. 


I got two sets of balls so that I would have four balls total.

The cost of this project was a budget friendly $3.00. 

I just LOVE to save money!


Thursday, October 16, 2014

Dollar Tree Pumpkin Goes Coastal

I have been looking all over for white or coastal looking pumpkins. Every thing that I find is so expensive and  not within my budget.  As I was strolling through Dollar Tree last week, I found it! Pumpkins within my budget but not the right color. These pumpkins were made from foam on the inside and smooth on the outside.  I bought 4 and went straight home to get started.  Here is a picture of what they looked like with painters tape on the stems.


Next, I put a garbage bag down on the floor and spray painted them white.  It took several coats. I let them dry over night.


 Then I took some blue paint that I had in the shed and made stripes on the pumpkin grooves.  The last step was to take a dry brush and lightly go over the rest of the pumpkin with the blue paint. Again I wanted that coastal look. 


Here is one in it's new home.   


These little cuties are just what I was looking for and had the just right price of $1.00 each. 


Thanks for reading my post!! 

Have a great day everyone :)


Monday, September 29, 2014

Fire Pit Refresh

Good Monday morning everyone!


I hope that everyone had a great weekend. I have been a busy bee this past weekend. We got a few projects done and a few more started. One project in particular jumped at me as I was browsing Pinterest. 


Pinterest


We have a fire pit with a bowl that looks something like this.


Via


The problem with this is that the base is not steady so it wobbles. I can fix it but it doesn't stay for long. 


We already had the same kind of brick that was used in my inspiration picture (above) out back. These are the bricks that we took out of our flower bed.


I loaded my wheel barrel with a few bricks to try them out.
I put a few down and kept measuring my fire pit bowl. After a few minor adjustments, I had what I wanted. 


 I didn't want the bricks to be too clean as I was going for the weathered look. I put the fire pit bowl on. PERFECT!


 I just love when I can do a project for FREE!  

This project was done just in time for my daughter's birthday party. She wants to roast marsh mellows with her friends.


One more item checked off of my birthday party list.  

Have a great day everyone :) 


Thursday, September 25, 2014

A Dolphin Birthday

Happy Thursday everyone! 

I have been crazy busy these last few weeks. I have been trying to plan for a baby shower, birthday party and fall decorations at the same time.


First up is my daughter's 9th birthday party. She is into anything "animal". As we just went to see the newest Winter movie, she has decided that she wants a dolphin party. 


Winter


 For those that do not know who Winter is, she is a dolphin that got caught in a net and beached herself in Florida. The Clearwater Marine Aquarium rescued her and saved her life. She had to have her tail removed because it was badly damaged. I don't want to give away too much for those that have not seen the movies. Winter still lives at the Clearwater Marine Aquarium. We took our daughter to Clearwater to see her and she is just beautiful. The Clearwater Marine Aquarium was struggling to make ends meet and to maintain the aquarium. After the movies were made, they had the money they needed so badly for repairs and to help save more animals. One of the workers at the aquarium also told us that they were just overwhelmed with the people that came to see Winter. They had so many people come that the aquarium had to get portable units to sell tickets. What a wonderful story.  I would encourage you to go online to learn more about Winter. The link is bellow Winter's picture located above.

 Anyway back to my daughter's party. She wants a dolphin cake and dolphin games. Her birthday is in November. I know that is over a month away but time flies when you are doing so many things at the same time. I have some great ideas that I will post as I complete each one. 

I have finished the goodie bags.  Here are the items that I used.


  • blue paper bag
  • glue stick
  • silver glitter glue
  • wave made from blue card stock
  • dolphin cut from a coloring page 

First, I made a wave from blue card stock. Next, I found a coloring page with a dolphin. I made copies of the dolphin on light blue paper and cut them out. I glued the wave on the paper bag first and then the dolphin.


The final step was to go along the outside of the dolphin and wave with the silver glitter and let dry.   


I still have to put the kid's names on the bags but I don't have all of the guests' names yet. The birthday girl has a limit of 12 guests.


Next on the list, invitations.


Monday, September 15, 2014

Hide the Electric Meter


Happy Monday! I hope everyone had a wonderful weekend.

I finished up a project that I  have been working on for a few weeks now. I have been trying to come up with a way to cover our ugly electric meter. As soon as I put my bench over the sprinkler system, I realized that I wanted to cover that ugly electric box.  Our electric company just switched our box to digital so they don't have to come out every month to read it. They can read it from their office.  Yea! 


A picture of my cool bench.


So I did what I always do, I went to Pinterest.  I found a few things, but did not get excited about any one thing. I took  the ideas that I liked from each picture and  put them all together.   Here are my inspirations.    

    
Via
Via


I found some old fencing out back and cut it to size. Then I got all of the materials that I thought that I might need. I started out with strong glue but I decided to use nails instead. Just in case I didn't like how it turned out.  


I sanded the fence just a bit to give it a fresh look. Then I traced the star fish and the relax template. I decided to do something different with the relax template after I already traced it.


Then I took a piece of rope and nailed it around my star fish. After that, I dusted the front with some white paint and a dry paint brush.

I went back to the shed and got a single piece of fence panel for my relax template. I also got two pieces of scrap wood to attached it to my main piece.  Next, I screwed the two scrap pieces to the back of my piece of fence panel and flipped it back over.  I then traced the relax template and painted the letters white. Then I got some rope and made two square knots (with my husband's help of course!). I put the square knots on my panel using the hot glue gun. The finished panel with attached to the main piece with screws. Here is the front view.


This is what it looked like from the back.


I had to figure out how to put my new creation up without making contact with the electric meter. I needed something that would keep it in place when the wind blows. I sure didn't want it to damage the meter. 

I went back out to the shed to make some braces to attach to the wall. I found some metal things that I got from the Dollar Tree to attach the braces to my creation. I think the metal things were supposed to hold things in the shed or something.  Here is a side view of the braces. There are two at the top and one at the bottom for support.


Here she is from the front.


At last, I can sit on my swing and I don't have to see the electric meter. 

Oh Happy Day!